
SwiftUI における開発で Firebase の Realtime Database を連携する方法を1から解説していきます。
Firebase プロジェクトの作成
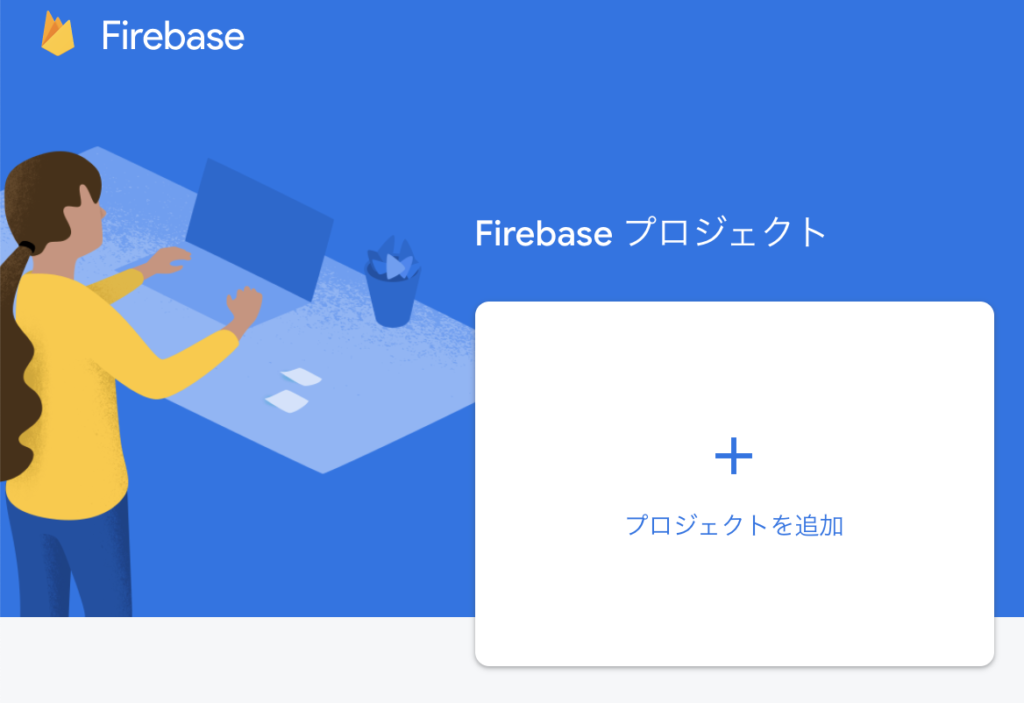
Firebase console にアクセスして、プロジェクトを新規作成します。
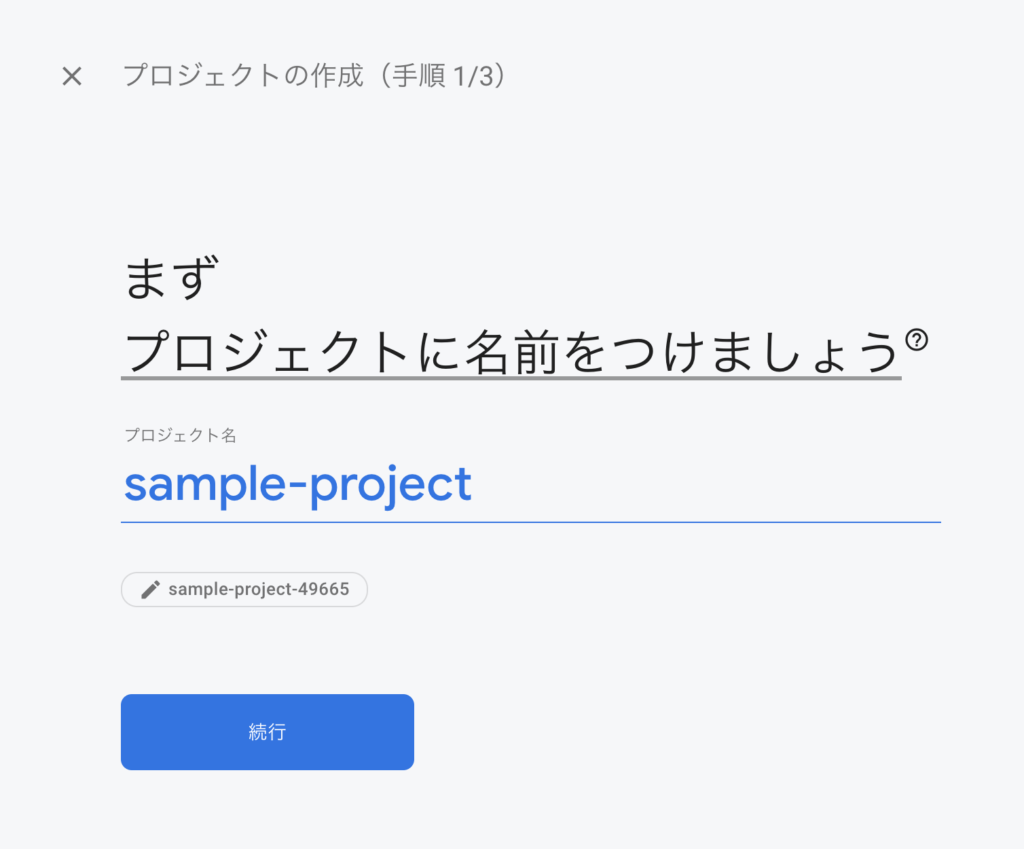
プロジェクト名を入力します。
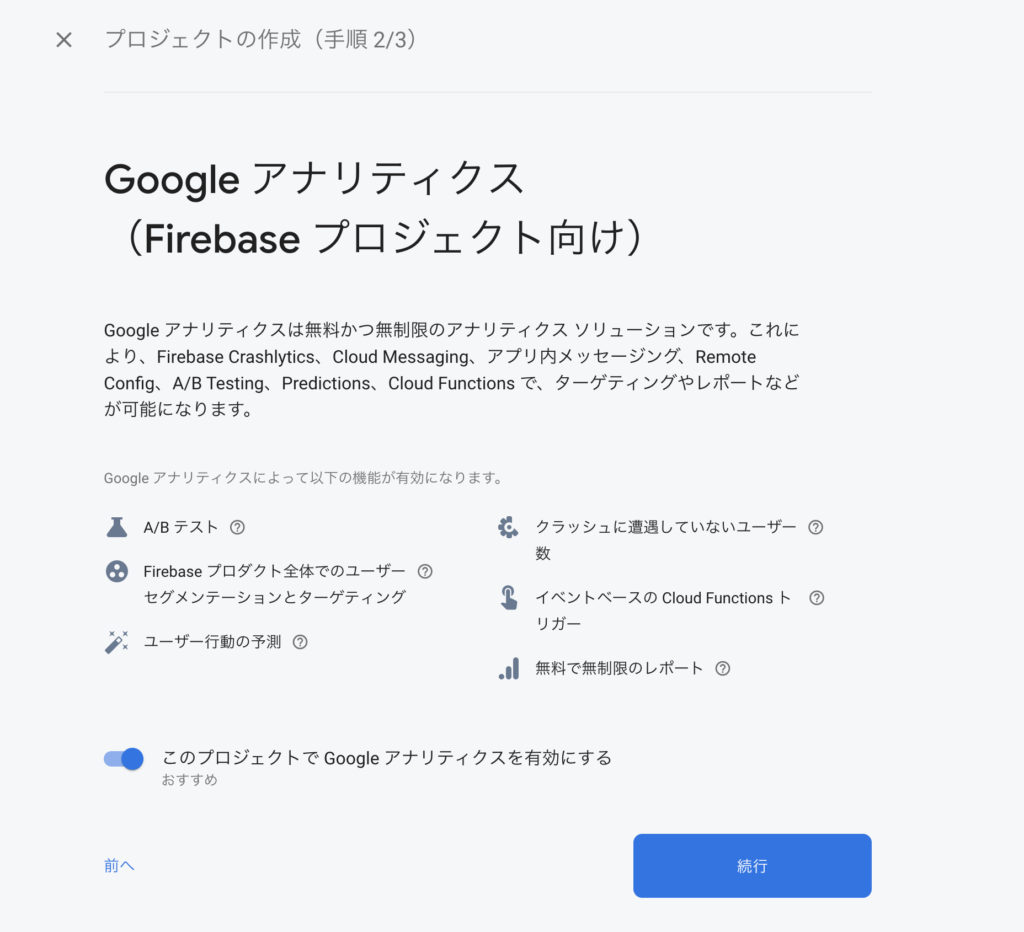
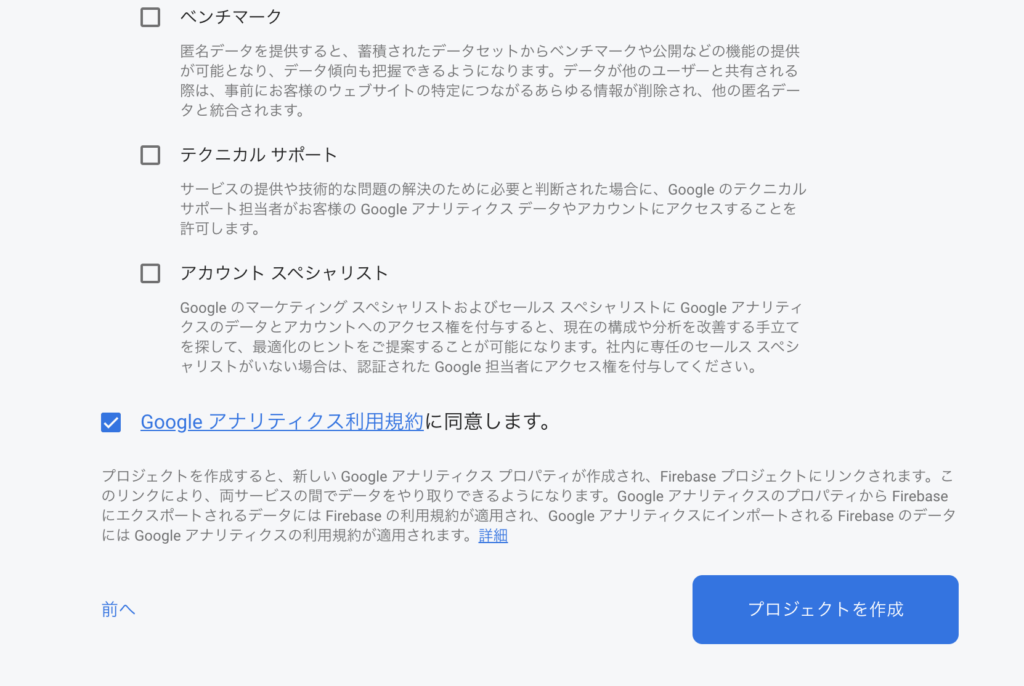
Google アナリティクス設定は今回は使わないのでどちらでも良いですが、とりあえず ON にしておきます。
Google アナリティクスアカウントを聞かれるので、新規で作成します。
アナリティクスの地域は日本にしておきましょう。
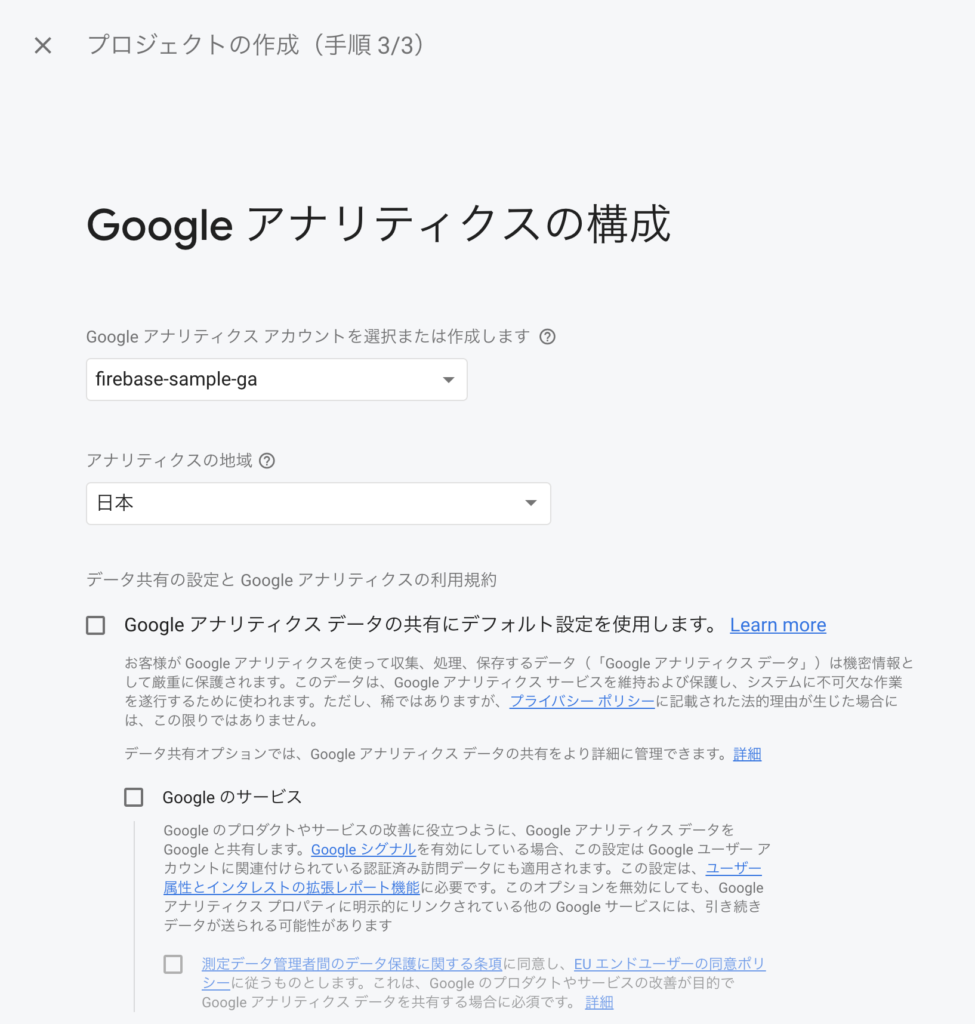
Google とのデータの共有は好みでチェックを付け、利用規約に同意すると Firebase のプロジェクトを作成できます。
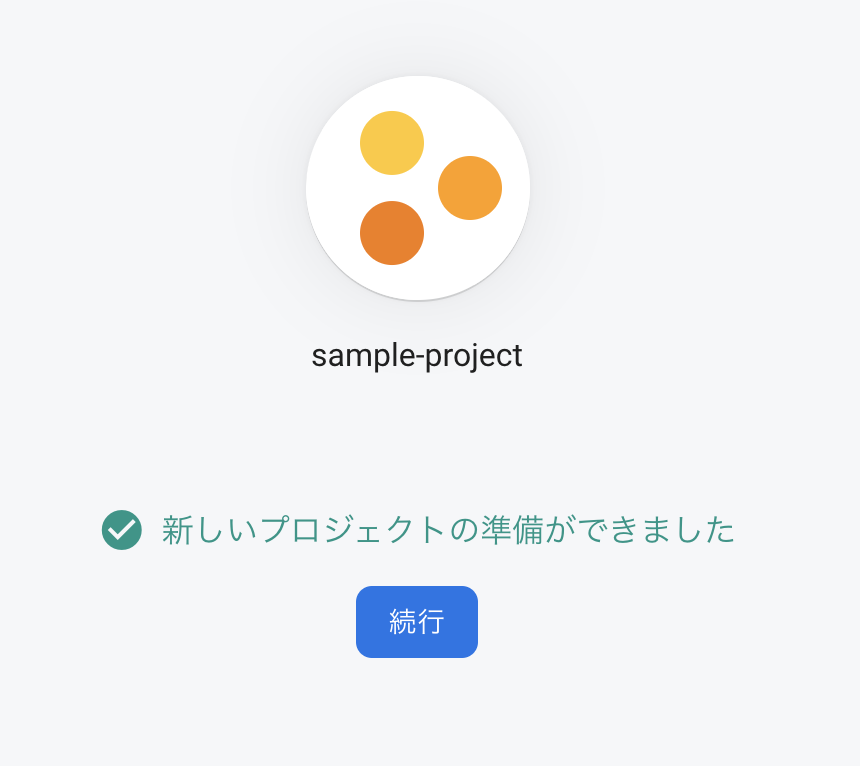
しばらく待つと、プロジェクトの作成が完了します。
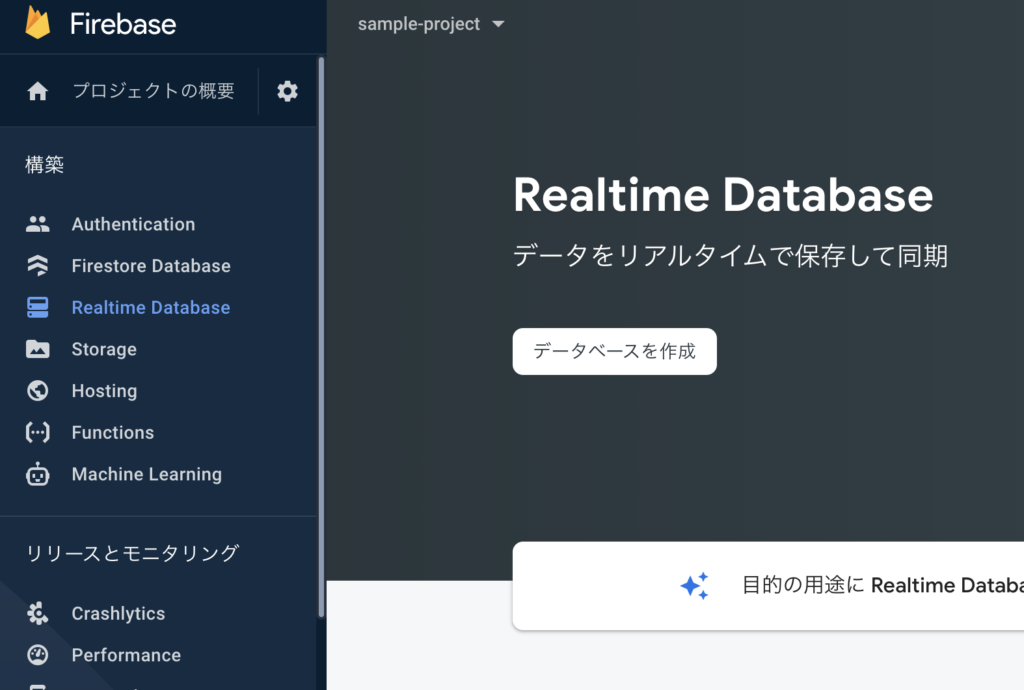
Realtime Database の作成
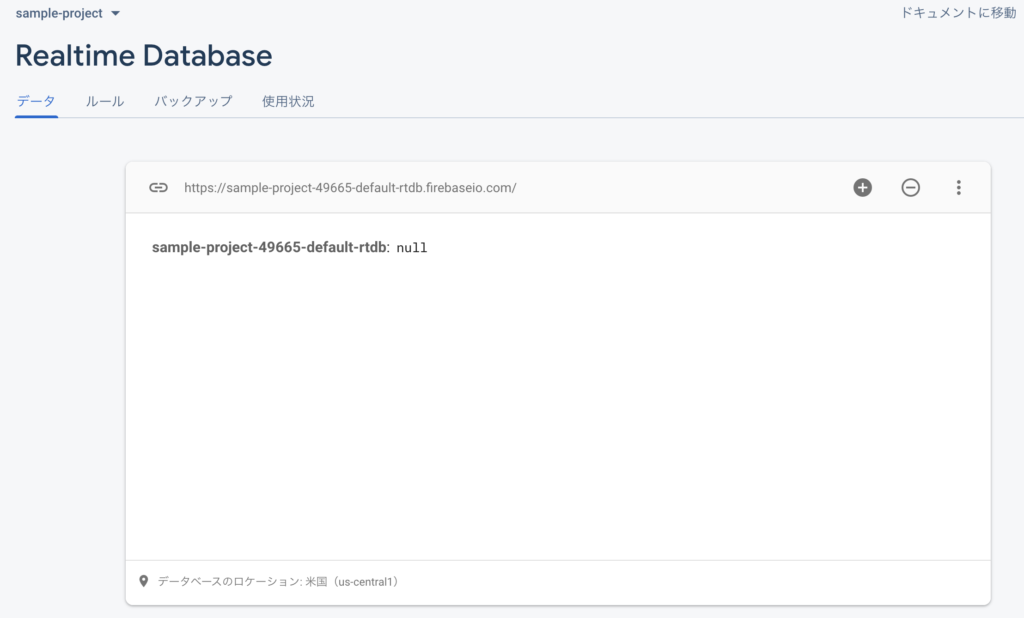
左のメニューから「Realtime Database」を選択して、「データベースを作成」をクリックします。
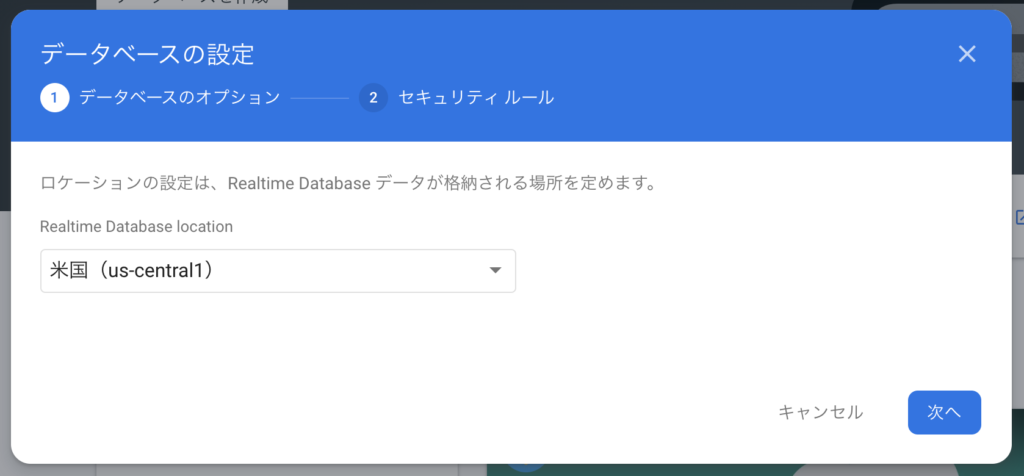
Realtime Database location はデフォルトの 「米国 (us-central1)」のままで OK です。
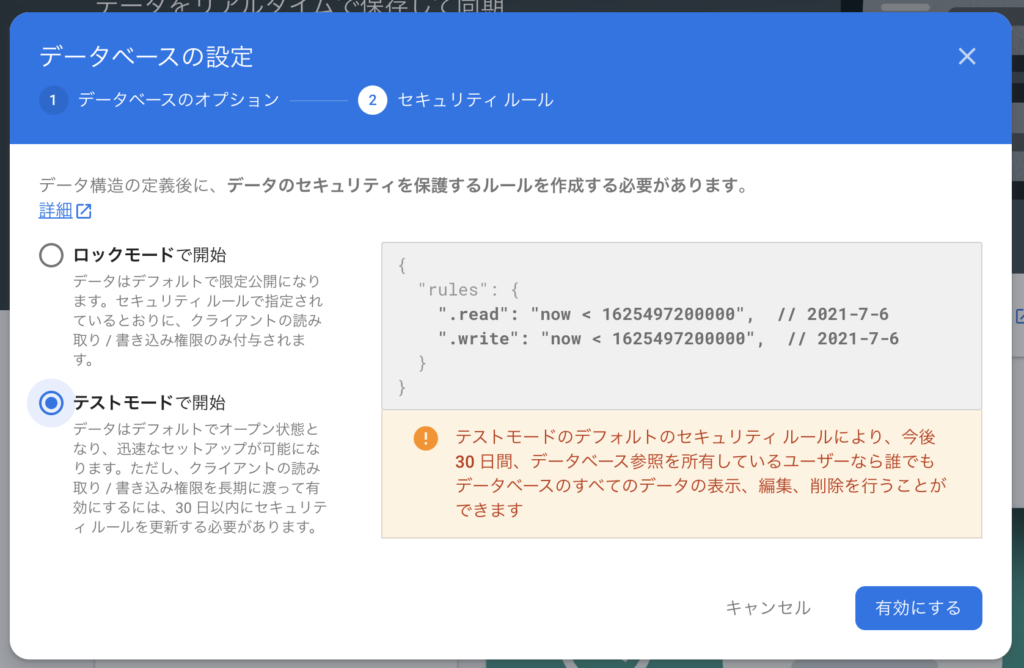
セキュリティルールはいったんテストモードにしておきましょう。
ここでは詳しく開設しませんが、この rules にていろいろと read / write の権限設定をすることができます。
テストモードのデフォルトだと「作成から30日間はプロジェクト内であれば誰でも読み書き可能」となっています。
もし、テスト期間を伸ばしたければ該当の数値を増やすか、そもそも
".read": true,としてしまえば OK です。
(開発完了時に適切なセキュリティルールにすることをお忘れなく)
これで Realtime Database が作成されました。
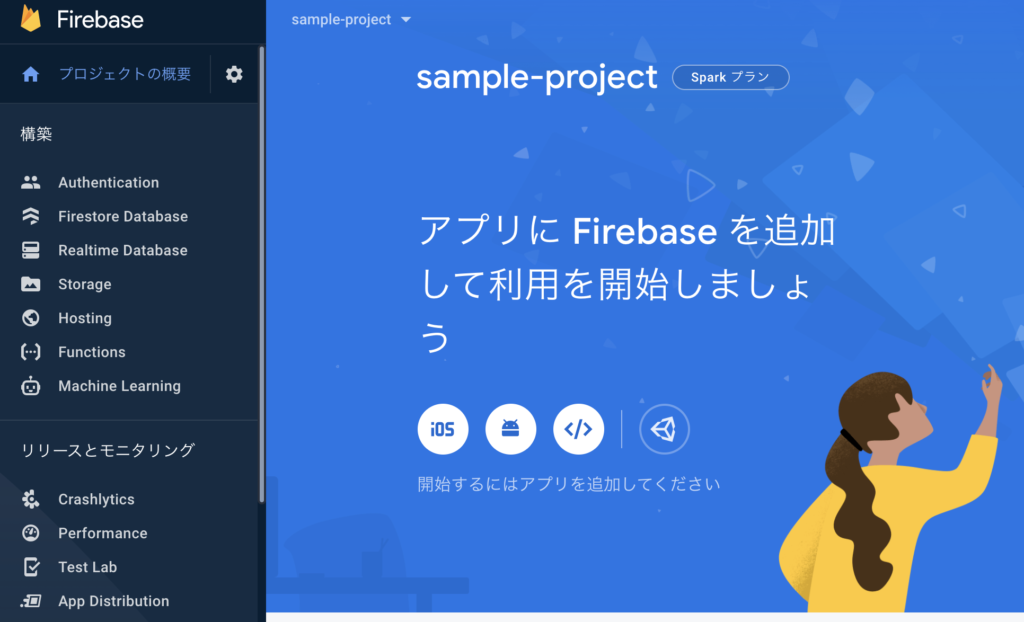
Firebase プロジェクトに iOS アプリを追加
プロジェクトの概要から iOS のアイコンをクリックします。
iOS バンドル ID を設定します。
この値は Xcode にて設定する Bundle Identifier と一致させてください。
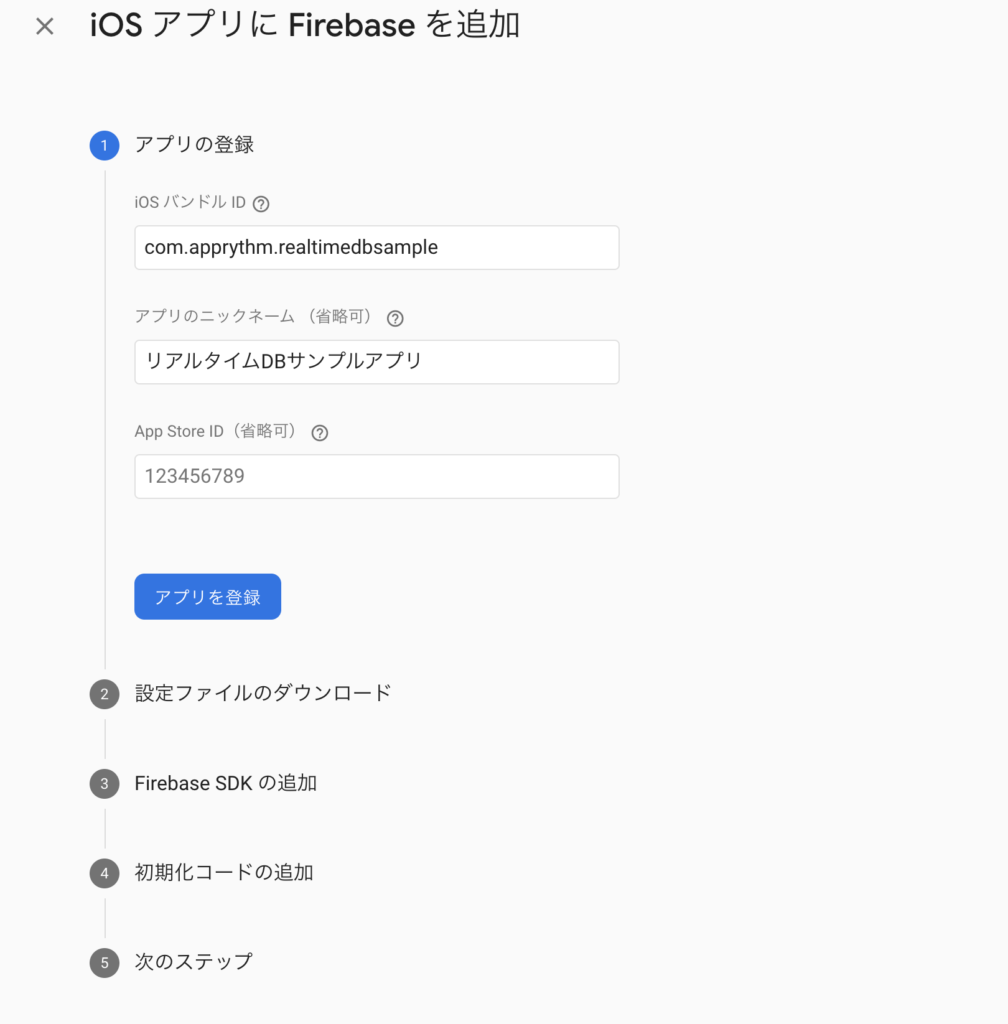
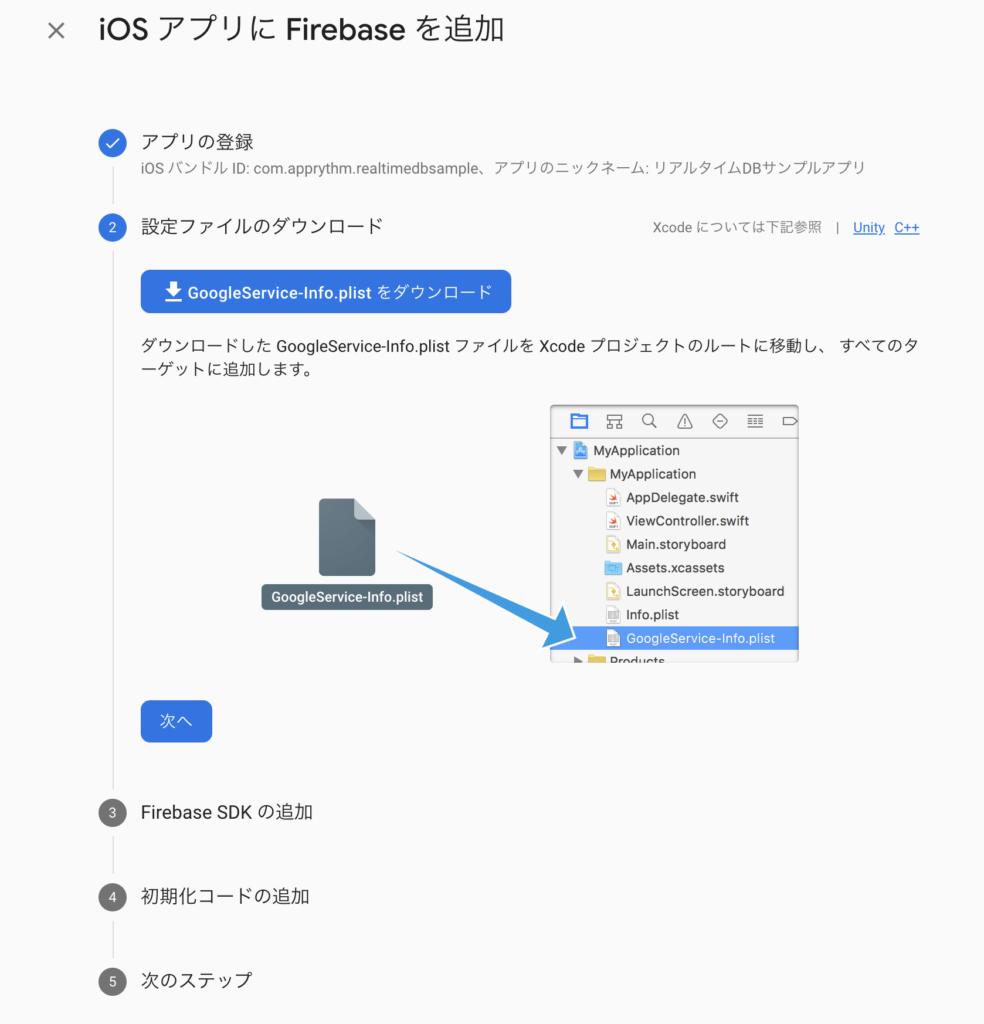
GoogleService-Info.plist をダウンロードし、所定の場所に置きます。
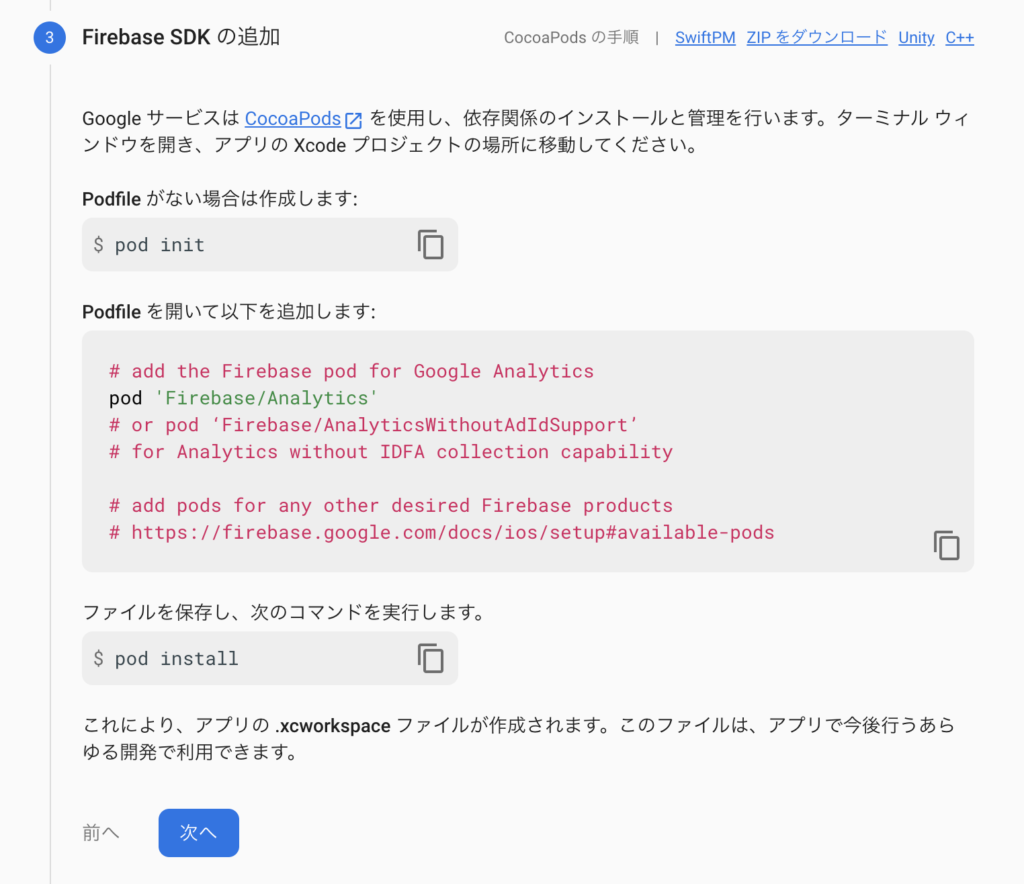
Firebase SDK の追加ですが、ここに書いてある手順ではなく、Swift Package Manager を使って追加してみます。
手順は下記を参考にしています。
Swift Package Manager を使用して Firebase をインストールする
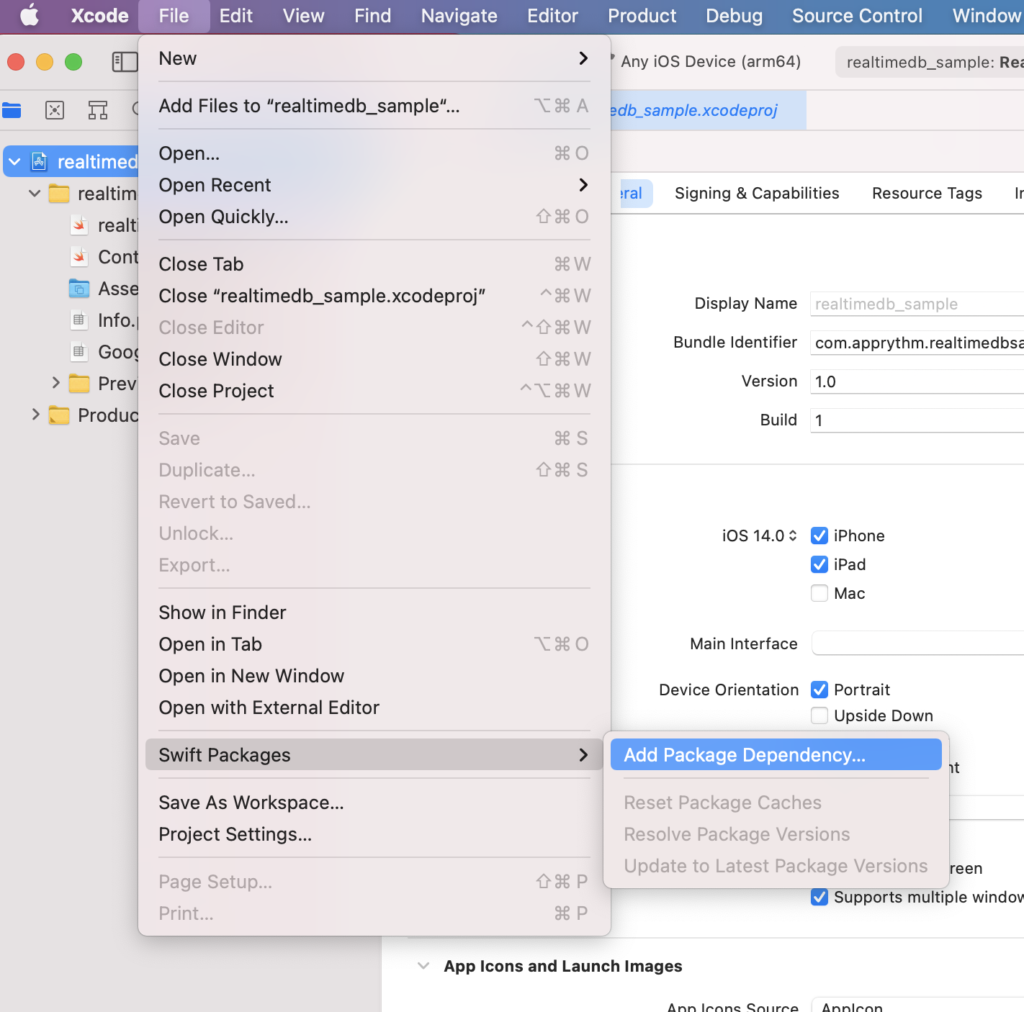
Xcode で
File > Swift Package > Add Package Dependency...
と選択します。
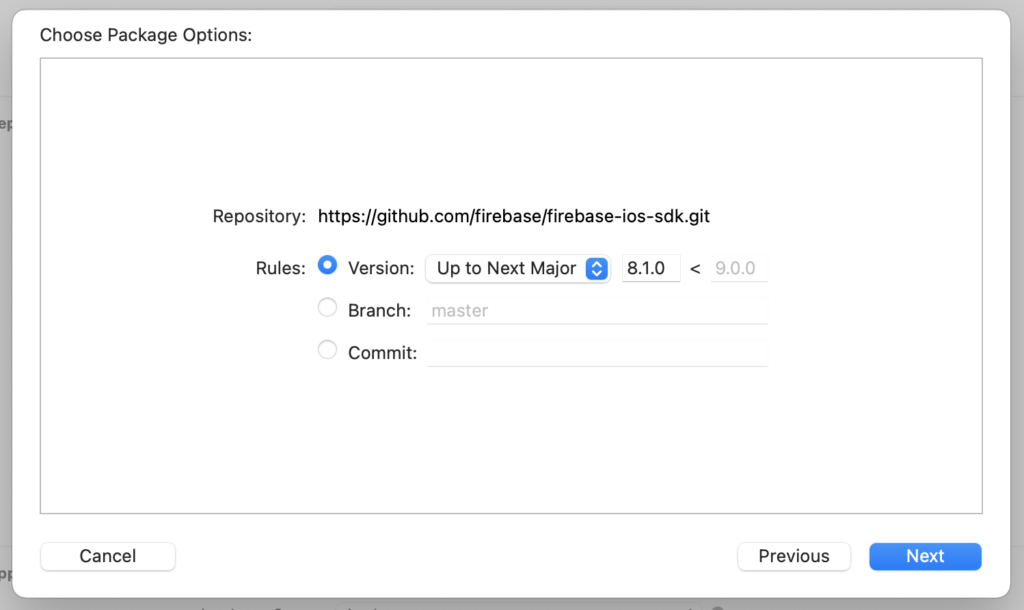
検索窓に https://github.com/firebase/firebase-ios-sdk.git と入力します。
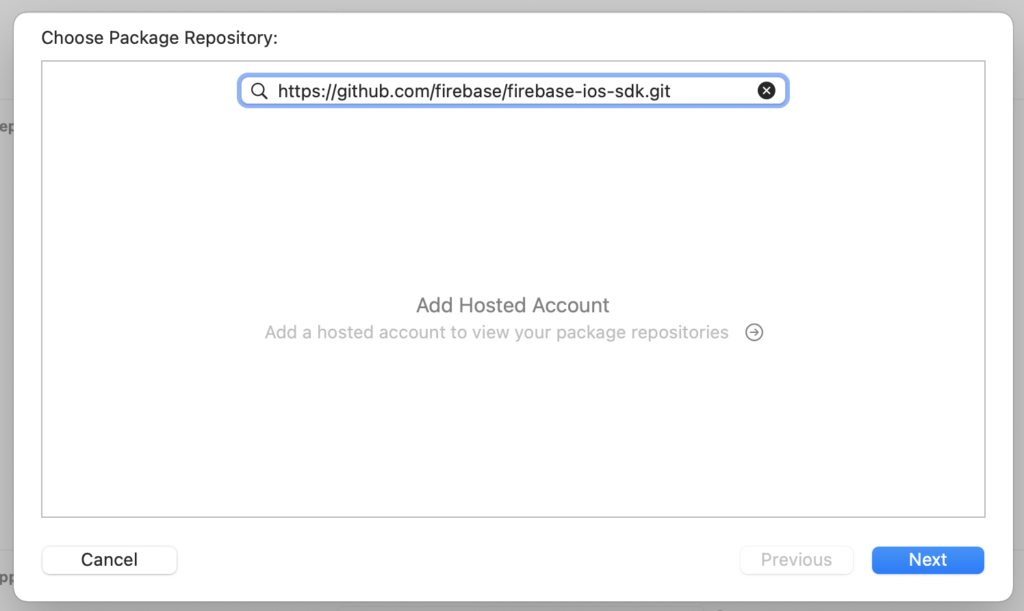
バージョンはそのままで OK です。
しばらく待ちます。
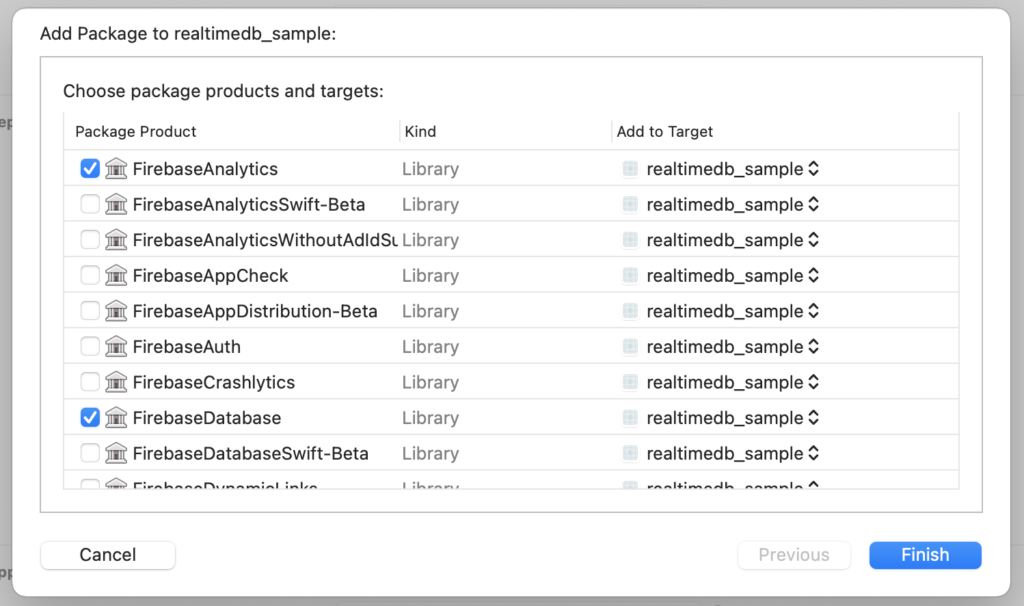
利用するパッケージを選択します。
ここでは「FirebaseAnalytics」と「FirebaseDatabase」にチェックを入れます。
Firebase SDK の追加が終わったら、初期化コードを書きます。
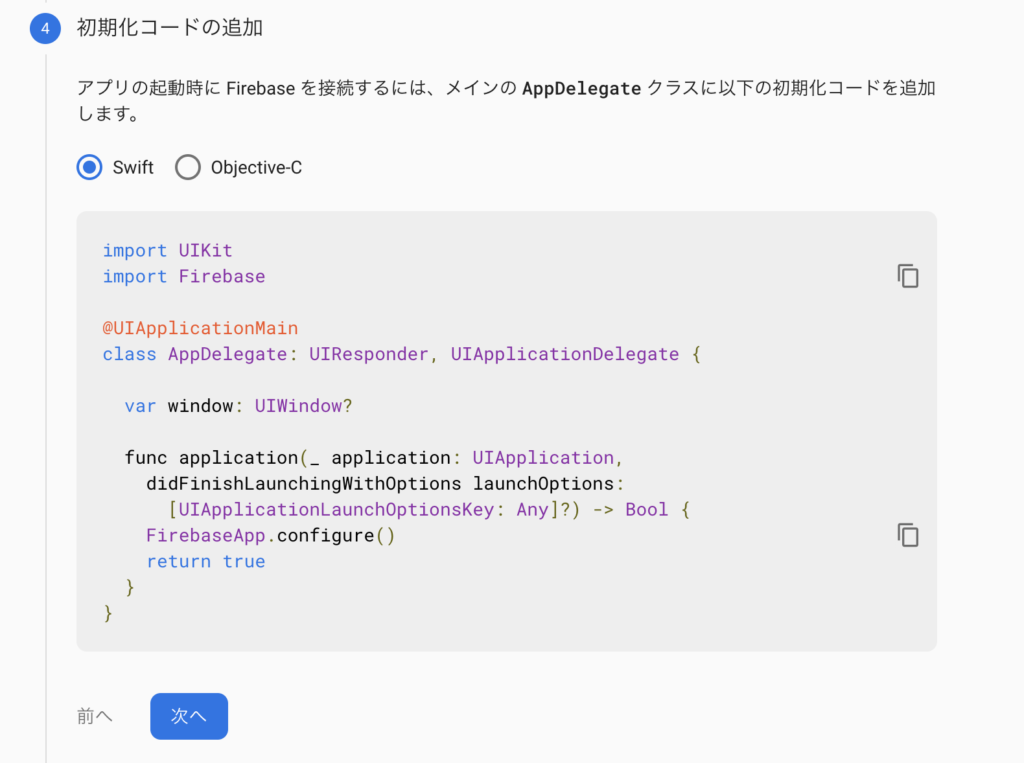
ただ、Xcode 12 からプロジェクトの作成時の Life Cycle で 「SwiftUI App」を選ぶと AppDelegate が作成されないので注意が必要です。
※「UIKit App Delegate」を選択した場合は従来どおり AppDelegate が生成されているはずなので大丈夫です
その際は「<プロジェクト名>App.swift」というファイルが生成されるので、そちらを下記のように修正します。
import SwiftUI
import Firebase // 追加

@main
struct realtimedb_sampleApp: App {
    @UIApplicationDelegateAdaptor(AppDelegate.self) var appDelegate // 追加
    var body: some Scene {
        WindowGroup {
            ContentView()
        }
    }
}

// 下記追加
class AppDelegate: UIResponder, UIApplicationDelegate {
    func application(_ application: UIApplication, didFinishLaunchingWithOptions launchOptions: [UIApplication.LaunchOptionsKey : Any]? = nil) -> Bool {
        FirebaseApp.configure()
        return true
    }
}
下記サイトを参考にさせていただきました。ありがとうございます。
[Xcode 12] アプリの起動について変更になった部分まとめ
これで完了です。
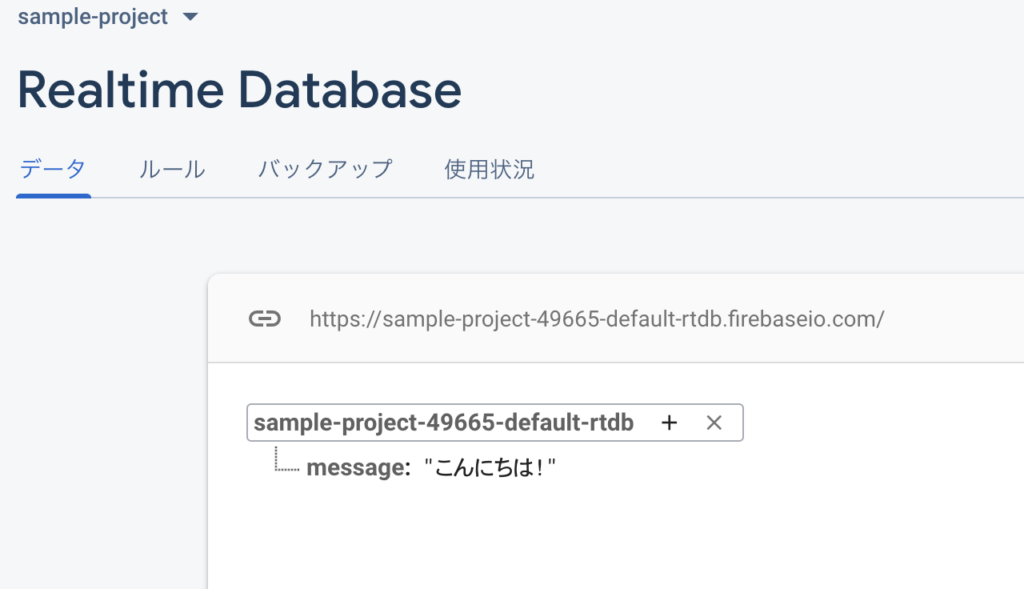
アプリをビルドして起動後、暫く経つと Firebase console のダッシュボードにデータが表示されるようになります。
Realtime Database のデータを取得して表示
Realtime Databse にデータを挿入します。
key は「message」、value は 「こんにちは!」とします。
ContentView.swift を下記のように修正します。
import SwiftUI
import FirebaseDatabase

struct ContentView: View {
    @State var message = ""

    var body: some View {
        VStack {
            Text(message)
                .padding()
        }.onAppear {
            let ref = Database.database().reference()
            ref.child("message").getData { (error, snapshot) in
                if let error = error {
                    print("Error getting data \(error)")
                }
                else if snapshot.exists() {
                    guard let message = snapshot.value as? String else {
                        return
                    }
                    self.message = message
                }
                else {
                    print("No data available")
                }
            }
        }
    }
}

struct ContentView_Previews: PreviewProvider {
    static var previews: some View {
        ContentView()
    }
}
アプリをビルドして実行すると、画面に「こんにちは!」と表示されます。
Realtime Database のデータを更新
ContentView.swift を下記のように修正します。
ラベルとテキストフィールドに変更し、ボタンを追加しました。
import SwiftUI
import FirebaseDatabase

struct ContentView: View {
    @State var message = ""

    var body: some View {
        VStack {
            TextField("", text: $message)
                .textFieldStyle(RoundedBorderTextFieldStyle())
            Button(action: {
                let ref = Database.database().reference()
                ref.child("message").setValue(message)
            }) {
                Text("保存")
            }
        }.onAppear {
            let ref = Database.database().reference()
            ref.child("message").getData { (error, snapshot) in
                if let error = error {
                    print("Error getting data \(error)")
                }
                else if snapshot.exists() {
                    guard let message = snapshot.value as? String else {
                        return
                    }
                    self.message = message
                }
                else {
                    print("No data available")
                }
            }
        }
    }
}

struct ContentView_Previews: PreviewProvider {
    static var previews: some View {
        ContentView()
    }
}
アプリを起動して、テキストフィールドの値を書き換えて「保存」ボタンを押すと値が更新されます。
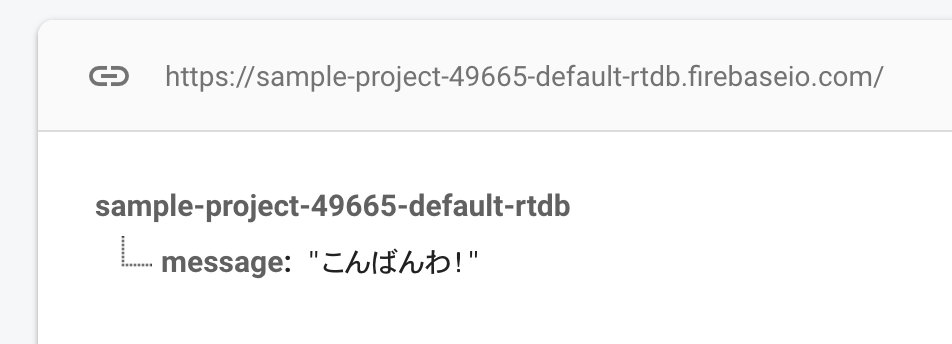
そのままでは値が本当に更新されたかわからないので、一度アプリを終了させて再度起動してみてください。

値が変わりましたね。
Firebase console で確認すると、実際に値が更新されていることがわかります。
まとめ
SwiftUI で Firebase Realtime Database を利用する手順を解説してきました。
非常に少ないコードかつある程度までなら無料で外部データベースとの連携ができるので、サクッとデータを保存、共有したい場合などには便利だと思います。
なお今回のコードは Realtime Database の説明に集中するために view ファイルに直接データの読み込み処理などを書いていますが、実際は model クラスなどを使って書くのが良いです。